Pre:
参考openzeppelin里的ERC20Snapshot,实现一个具有快照功能的erc20代币
github仓库地址: https://github.com/jerrychan807/cool-erc20/tree/main/snapshot
需求:
代币发生转移时,以当前区块数做快照id,记录发生转移前的用户余额或代币供应量。
部署:
无
编写合约:
自定义快照策略:
注释里有提到要怎么修改:
可以通过覆盖
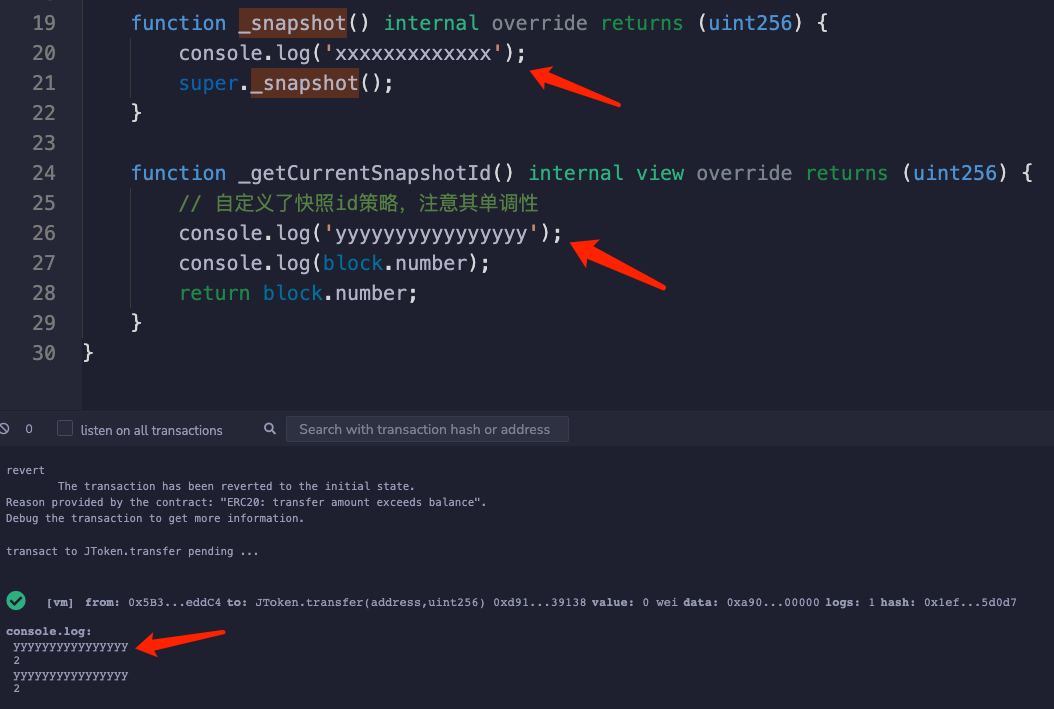
{_getCurrentSnapshotId}方法来自定义快照策略。例如,return
block.number,将在每个新块的开头触发创建快照。当覆盖这个函数,注意其结果的单调性(需要单增)。非单调的快照 id 会破坏合约。
ERC20Snapshot源码里的快照id原本是一个计数器,该计数器只能+1,-1这样去操作。
1 | // ERC20Snapshot源码 |
如果要用当前区块数做快照id,那就要重写该变量,并且重写与该变量有关的两个函数:
-
function _snapshot() internal virtual returns (uint256) {} -
function _getCurrentSnapshotId() internal view virtual returns (uint256) {}
从而自己去管理这个快照id
还要注意_updateSnapshot()函数里,有个触发快照的判断条件
1 | if (_lastSnapshotId(snapshots.ids) < currentId) { // 触发快照的条件:当前id要比上一次存储的id大 |
在测试几次后,发现要在构造器里初始化_currentSnapshotId才行,不然这个_currentSnapshotId一直为0,一直过不了这个判断条件,不执行快照。
在实现的时候,还被private修饰符搞得很晕。。。私有变量不能直接在子类访问或修改,只能通过调用父类的函数去访问或修改,或者该变量相关的定义和函数都自己重写覆盖掉(我采用的是后者)
tips: 理解清楚
private,internal,virtual这几个修饰符后,才能更好的写出面向对象的。。精简的代码。。
测试:
Remix:
先在remix简单测试,由于继承了父类的一些方法,用console.log去Debug,易于知道自己的方法在什么时候能够调用到
1 | import "hardhat/console.sol"; |
hardhat:
获取tx详情:
在hardhat自带环境,不用像测试网那样要wait,可直接获得被确认后的tx详情
1 | tx = await tokenOwner.Token.transfer(users[0].address, amountWei1); |
trick:
如果是使用hardhat环境,修改代码后不需要再编译、部署,直接运行 yarn hardhat test,就可以使用新代码
测试结果:
符合预期
1 | Token contract |
Summary:
-
阅读源码技巧:
Slither输出继承关系图,还差一个能输出函数互相调用的图的工具。 -
加深对
solidity继承这一块的理解,理解清楚private,internal,virtual等修饰符,才能更好的写出面向对象的精简的代码。。目前这一块还是有点晕😓 -
多看如
openzeppelin这类优秀的源码库,可以学到很多优秀的代码实现,且少写很多代码